Posted on — Leave a comment

Kickstand Balance Turns: Build Mid-Back Rotation & Pelvic Dissociation for Golfers

Balance turns are a great golf exercises to improve single leg stability, pelvic dissociation as well as thoracic spine mobility to improve your golf game.

What are Kickstand Balance Turns and why should golfers care?

Kickstand Balance Turns are a golf-specific stability and mobility drill designed to enhance mid-back rotation while maintaining isometric hip control. By placing the rear leg in a “kickstand” position—either gently touching the ground (split stance) or hovering (single-leg)—you force the pelvis to stabilize on the front (lead) leg. With arms held in front of your chest, rotating toward the planted (lead) side isolates thoracic mobility, teaches pelvic dissociation, and translates directly into a more powerful, consistent golf swing.

What Are Kickstand Balance Turns?

  • Definition: Kickstand Balance Turns are performed in a split–or single–leg stance, where the rear leg lightly supports (kickstand) or floats, and the front leg (lead foot) bears full weight.
  • Setup: Start in a comfortable split stance (right-handed golfer: left foot forward, right foot back with toes down or hovering). Hold your hands or a club horizontally in front of your chest.
  • Movement: Rotate your torso and mid-back toward the lead leg, maintaining a stable pelvis and hip on the front side. Slowly return to center and repeat.

By isolating rotation to the mid-back while keeping the pelvis and hips locked, you train the disassociation necessary for a powerful, pain-free swing.


Why Kickstand Balance Turns Matter for Golfers

  1. Mid-Back (Thoracic) Rotation
    • Golfers often lack thoracic mobility due to prolonged sitting or poor posture.
    • Improved thoracic rotation allows a deeper coil, more torque, and reduced reliance on the lumbar spine.
  2. Pelvic Dissociation
    • Learning to rotate the upper body independently of the pelvis prevents “early extension” and loss of posture in the downswing.
    • A stable front hip (lead leg) is crucial for transferring ground force into rotational power.
  3. Isometric Hip Control
    • With the back leg in “kickstand” position, the front hip must maintain a static hold, building glute medius and adductor stability—key for resisting lateral sway.
  4. Single-Leg Balance & Proprioception
    • Progressing to a single-leg position increases neuromuscular engagement and balance, mirroring the single-leg support phase at impact.
    • Enhances ankle, knee, and hip stability, reducing compensatory movement patterns that lead to injury.

How to Perform Kickstand Balance Turns

Equipment: None (optional light club, dowel, or resistance band across shoulders).
Reps/Sets: 2–3 sets of 8–10 rotations per side, 2–3 times per week.

  1. Setup (Split Stance):
    • Stand with your lead foot (left for right-handed golfers) flat and knee slightly bent.
    • Place your trail toes lightly on the ground (kickstand) or hover the back foot a few inches off the ground for single-leg progression.
    • Hold a club or keep hands together at chest height (elbows bent to 90°).
  2. Brace & Load:
    • Engage core by creating intra-abdominal pressure (IAP). Think “brace for impact.”
    • Press your lead foot firmly into the ground, ensuring the hip does not collapse inward.
  3. Rotate Mid-Back:
    • Keeping the pelvis square (avoid shifting weight laterally), rotate your thoracic spine and shoulders toward the lead leg.
    • Allow your head to follow your chest, but keep the lower body stable.
    • Stop at a comfortable end-range where you feel tension but no pain.
  4. Return to Center:
    • Reverse the motion with control, maintaining hip stability.
    • Do not let the pelvis or hips “cheat” by rotating with your torso.
  5. Repeat on the Opposite Side:
    • Switch lead leg (e.g., to practice opposite-handed rotational control and deceleration).

Coaching Tip: If you feel your hip collapsing or stacking onto the inside of your foot, reset by slightly reducing range or using a light support (e.g., wall for balance).


Common Mistakes & Coaching Cues

MistakeCue / Fix
Hips shifting or sliding“Keep your pelvis square, imagine a glass of water on your hip—don’t spill it.”
Lower back compensating“Brace your core, think of pulling your belly button toward your spine.”
Rear knee collapsing (split stance)“Press the front hip back and down; avoid letting the back foot bear load.”
Incomplete thoracic rotation“Lead with your chest; keep your eyes following the movement.”

Benefits for Golf Swing Mechanics

  1. Improved X-Factor Separation
    • By stabilizing the hips and isolating the thoracic rotation, you create more torso-pelvis separation. More separation equals greater elastic energy and clubhead speed.
  2. Reduced Swing Faults
    • Early extension (hips shifting toward the ball), sway (lateral shift), and loss of posture often result from inadequate hip and thoracic control. Kickstand Balance Turns directly train these areas.
  3. Enhanced Impact Stability
    • Developing single-leg stability on the lead side helps you maintain your spine angle through impact, compress the ball, and avoid deceleration-related mis-hits.
  4. Lower Back Protection
    • Teaching the mid-back to rotate reduces compensatory lumbar spine movement, decreasing the risk of low-back pain—a top complaint among golfers.

Progressions & Variations

  1. Level 1: Split Stance, Rear Toes Down
    • Focus on isometric hip control with feet hip-width apart. Keep rear toes lightly on the ground for balance.
  2. Level 2: Split Stance, Rear Foot Hovering
    • Remove the rear foot support (hover a few inches off the ground). Increases single-leg control on the lead side.
  3. Level 3: Single-Leg Kickstand Balance Turns
    • Fully remove rear foot contact. Maintain lead-leg stability and balance throughout the rotation.
  4. Level 4: Add Overhead Club Hold
    • Hold a club or dowel overhead to engage shoulder stability and challenge thoracic extension. This mimics an “extended arms” finish in the golf swing.
  5. Level 5: Weighted Pull or Band Resistance
    • Hold a light dumbbell in the pulling hand to train anti-rotation under load. Alternatively, anchor a band in front and pull across the body as you rotate.

When & How Often to Include This Drill

  • Frequency: 2–3 times per week
  • Sets/Reps: 2–3 sets of 8–10 reps per side
  • Timing:
    • Pre-round warm-up: Use Level 1 or 2 to activate hip and thoracic mobility
    • Core/stability day: Incorporate Level 2–4 for more challenge
    • Recovery day: Focus on Level 1 with deep breathing for relaxation and mobility

Tip: Always start with a quick hip CARs or ankle rockers warm-up to ensure joints are prepped for rotation.


Other Exercises to Improve Your Golf Game


Kickstand Balance Turns Frequently Asked Questions

Q1: What muscles does the Kickstand Balance Turn target?
A: It primarily activates the gluteus medius, obliques, transverse abdominis, thoracic extensors, and rotators while teaching the pelvis to stabilize on a single leg.

Q2: How does pelvic dissociation help my golf swing?
A: Pelvic dissociation allows your upper body to rotate independently of your lower body, increasing torque and clubhead speed while reducing lumbar compensation.

Q3: Can beginners do Kickstand Balance Turns?
A: Yes—start with Level 1 (split stance, rear toes down) and gradually progress to single-leg variations as you build stability and balance.

Q4: How is this different from a regular single-leg rotation drill?
A: By maintaining a kickstand leg (rear toe or hover), you isolate the lead hip in a more golf-specific stance, forcing anti-rotation while mimicking impact stance mechanics.


Your Next Steps: Build a Bulletproof Golf Body

This exercise is just one of the dozens of targeted golf exercises in our PinSeeker Performance Program—a 6-week, lifetime-access golf workout program designed to build mobility, strength, and power exactly where you need it.

🏌️‍♂️ Swing with more rotation and less pain
🏋️‍♀️ Improve strength, flexibility, and balance
⛳️ Play more consistently, regardless of age or experience

✅ One-time purchase
✅ Lifetime access
✅ Golf-Specific workouts you can do anywhere

Train smarter, swing stronger, and see real gains on the course with PinSeeker!

our 6-week pinseeker performance program is the best online golf fitness program

Posted on — Leave a comment

Lateral Line Stretch for Golfers – Improve Stability, Posture & Prevent Low-Back Pain

the lateral line golf stretch is a great golf exercise to help unwind the lateral fascial line of your body to improve your posture and golf swing.

Why the Lateral Line Stretch Matters for Golfers

A stable, powerful golf swing relies on both frontal plane stability (side-to-side control) and transverse plane rotation. The lateral fascial line—running from the foot’s peroneals up through the iliotibial band (ITB), tensor fascia lata (TFL), quadratus lumborum (QL), intercostals, and latissimus dorsi—connects those planes. When any portion of this lateral chain becomes tight or shortened, it compromises your ability to:

  • Stack your spine over your stance
  • Efficiently shift weight and resist unwanted sway
  • Maintain upright posture through the swing
  • Avoid low-back compression (S-posture) and subsequent pain

The simple yet effective lateral line stretch addresses these restrictions by lengthening the QL, lats, intercostals, TFL/ITB, and peroneals—all in one movement. This means better side-bend control, improved stacked posture, and a reduced risk of swing faults like swaying, sliding, and early spine collapse.


Anatomy & Common Dysfunctions

  1. Quadratus Lumborum (QL)
    • Originates at the iliac crest and inserts on the 12th rib and lumbar vertebrae.
    • Tightness here pulls the lower ribcage down and tilts the pelvis, promoting an “S-shaped” spine during the swing.
  2. Latissimus Dorsi & Intercostals
    • The lats attach from the lumbar spine to the humerus; intercostals run between ribs.
    • Tightness restricts ribcage mechanics, limiting full rotation and forcing compensations in the lumbar spine.
  3. Tensor Fascia Lata (TFL) & Iliotibial Band (ITB)
    • The TFL originates from the iliac crest and inserts into the ITB, which runs down the lateral thigh to the tibia.
    • A tight lateral thigh can restrict hip abduction and side-bending freedom, leading to an unstable trail side during the backswing.
  4. Peroneal/Fibularis Muscles
    • Located on the outside of the lower leg, these muscles assist in foot eversion and lateral stability.
    • Tight peroneals limit ankle mobility in the frontal plane, hindering weight shift and balance.

When this entire chain is restricted, golfers lose the ability to “stack”—that is, maintain a neutral spine without lateral collapse. Instead, they often sway or slide into the backswing, overbend in the lower back, or lose posture through impact, creating low back pain and diminished power.


How to Perform the Lateral Line Stretch

Setup:

  • Position: Stand beside a wall or sturdy object for support.
  • Foot Stance: Place your inside foot (closest to the wall) slightly forward; your outside foot remains back so you can lean into the stretch.
  • Arm Placement: Raise the arm on the side you’re stretching overhead.

Execution:

  1. Stack Your Spine:
    • Keep your pelvis neutral—avoid letting your hips hike or sag.
    • Brace your core by creating intra-abdominal pressure (IAP), maintaining a slight “tuck” in your tailbone.
  2. Side Bend & Reach:
    • Lean your torso away from the wall, reaching your top hand up and over toward the wall.
    • Keep your ribs stacked over your pelvis—don’t rotate or twist.
  3. Foot & Leg Engagement:
    • Press your outside leg into the ground to prevent lateral collapse of your hips.
    • You should feel a deep stretch from your peroneal muscles, up your ITB/TFL, into your QL, and along your lat/intercostals.
  4. Hold & Breathe:
    • Hold for 30–45 seconds, breathing deeply into the side body to encourage ribcage expansion.
    • Exhale and gently press your hips away from the wall to intensify the stretch, but never force it into pain.
  5. Switch Sides:
    • Carefully return to standing, then mirror the stretch on the opposite side.

Modifications & Tips:

  • Beginner Variation: Keep feet closer together and reduce side-bend depth until you develop stability.
  • Advanced Variation: Place the outside foot on a low step or yoga block to accentuate TFL/ITB stretch.
  • Pelvic Cue: Imagine “loading” the outside hip by pressing it slightly back—this prevents hip hiking.

Transferring This Stretch to Your Golf Swing

  1. Enhanced Frontal Plane Stability
    • By lengthening the QL and lateral chain, you resist unwanted “sway” into the backswing. A stable trail side means a smoother weight shift and less compensatory low-back bending.
  2. Improved Stack & Pivot
    • A neutral pelvis and elongated lats allow a fuller upper-body turn without collapsing into the side. This “stacked” spine promotes better pivot mechanics—your hips and shoulders rotating around a stable axis.
  3. Reduced Low-Back Compression
    • Freeing the lateral chain discourages the lower spine from over-arching into S-posture, lowering the risk of chronic pain and fatigue during or after rounds.
  4. Longer, More Powerful Swing Arc
    • When your anterior oblique and lateral fascial lines are open, you can achieve more X-Factor separation (torso-pelvis difference), feeding energy into the downswing and maximizing clubhead speed.

Integrate the Lateral Line Stretch into Your Golf Stretches Routine

  • Pre-Round Warm-Up: 1–2 holds per side after dynamic hip and thoracic mobility drills (e.g., Hip CARs, T-Spine Openers).
  • Post-Round Recovery: Hold 45–60 seconds per side to release excursion built up from rotational swings.
  • Daily Maintenance: Include on off-days or after prolonged sitting to counteract habitual lateral fascial tightness.

Sample Mobility Sequence:

  1. Ankle Rockers (10 reps per side)
  2. Hip CARs (3 reps each direction per side)
  3. Lateral Line Stretch (30–45 seconds each side)
  4. T-Spine Lumbar Lock Openers (8 reps per side)

Lateral Line Stretch for Golfers 55+

For golf exercises for seniors, this stretch is especially valuable because it:

  • Is low impact and joint-friendly
  • Promotes spinal decompression and better posture
  • Reduces fall risk by improving lateral stability
  • Eases QL and lower-back discomfort often exacerbated by long rounds or driving

Ready To Level Up Your Golf Game?

This exercise is just one of the dozens of targeted golf exercises in our PinSeeker Performance Program—a 6-week, lifetime-access golf workout program designed to build mobility, strength, and power exactly where you need it.

🏌️‍♂️ Swing with more rotation and less pain
🏋️‍♀️ Improve strength, flexibility, and balance
⛳️ Play more consistently, regardless of age or experience

✅ One-time purchase
✅ Lifetime access
✅ Golf-Specific workouts you can do anywhere

Train smarter, swing stronger, and see real gains on the course with PinSeeker!

our 6-week pinseeker performance program is the best online golf fitness program

Posted on — Leave a comment

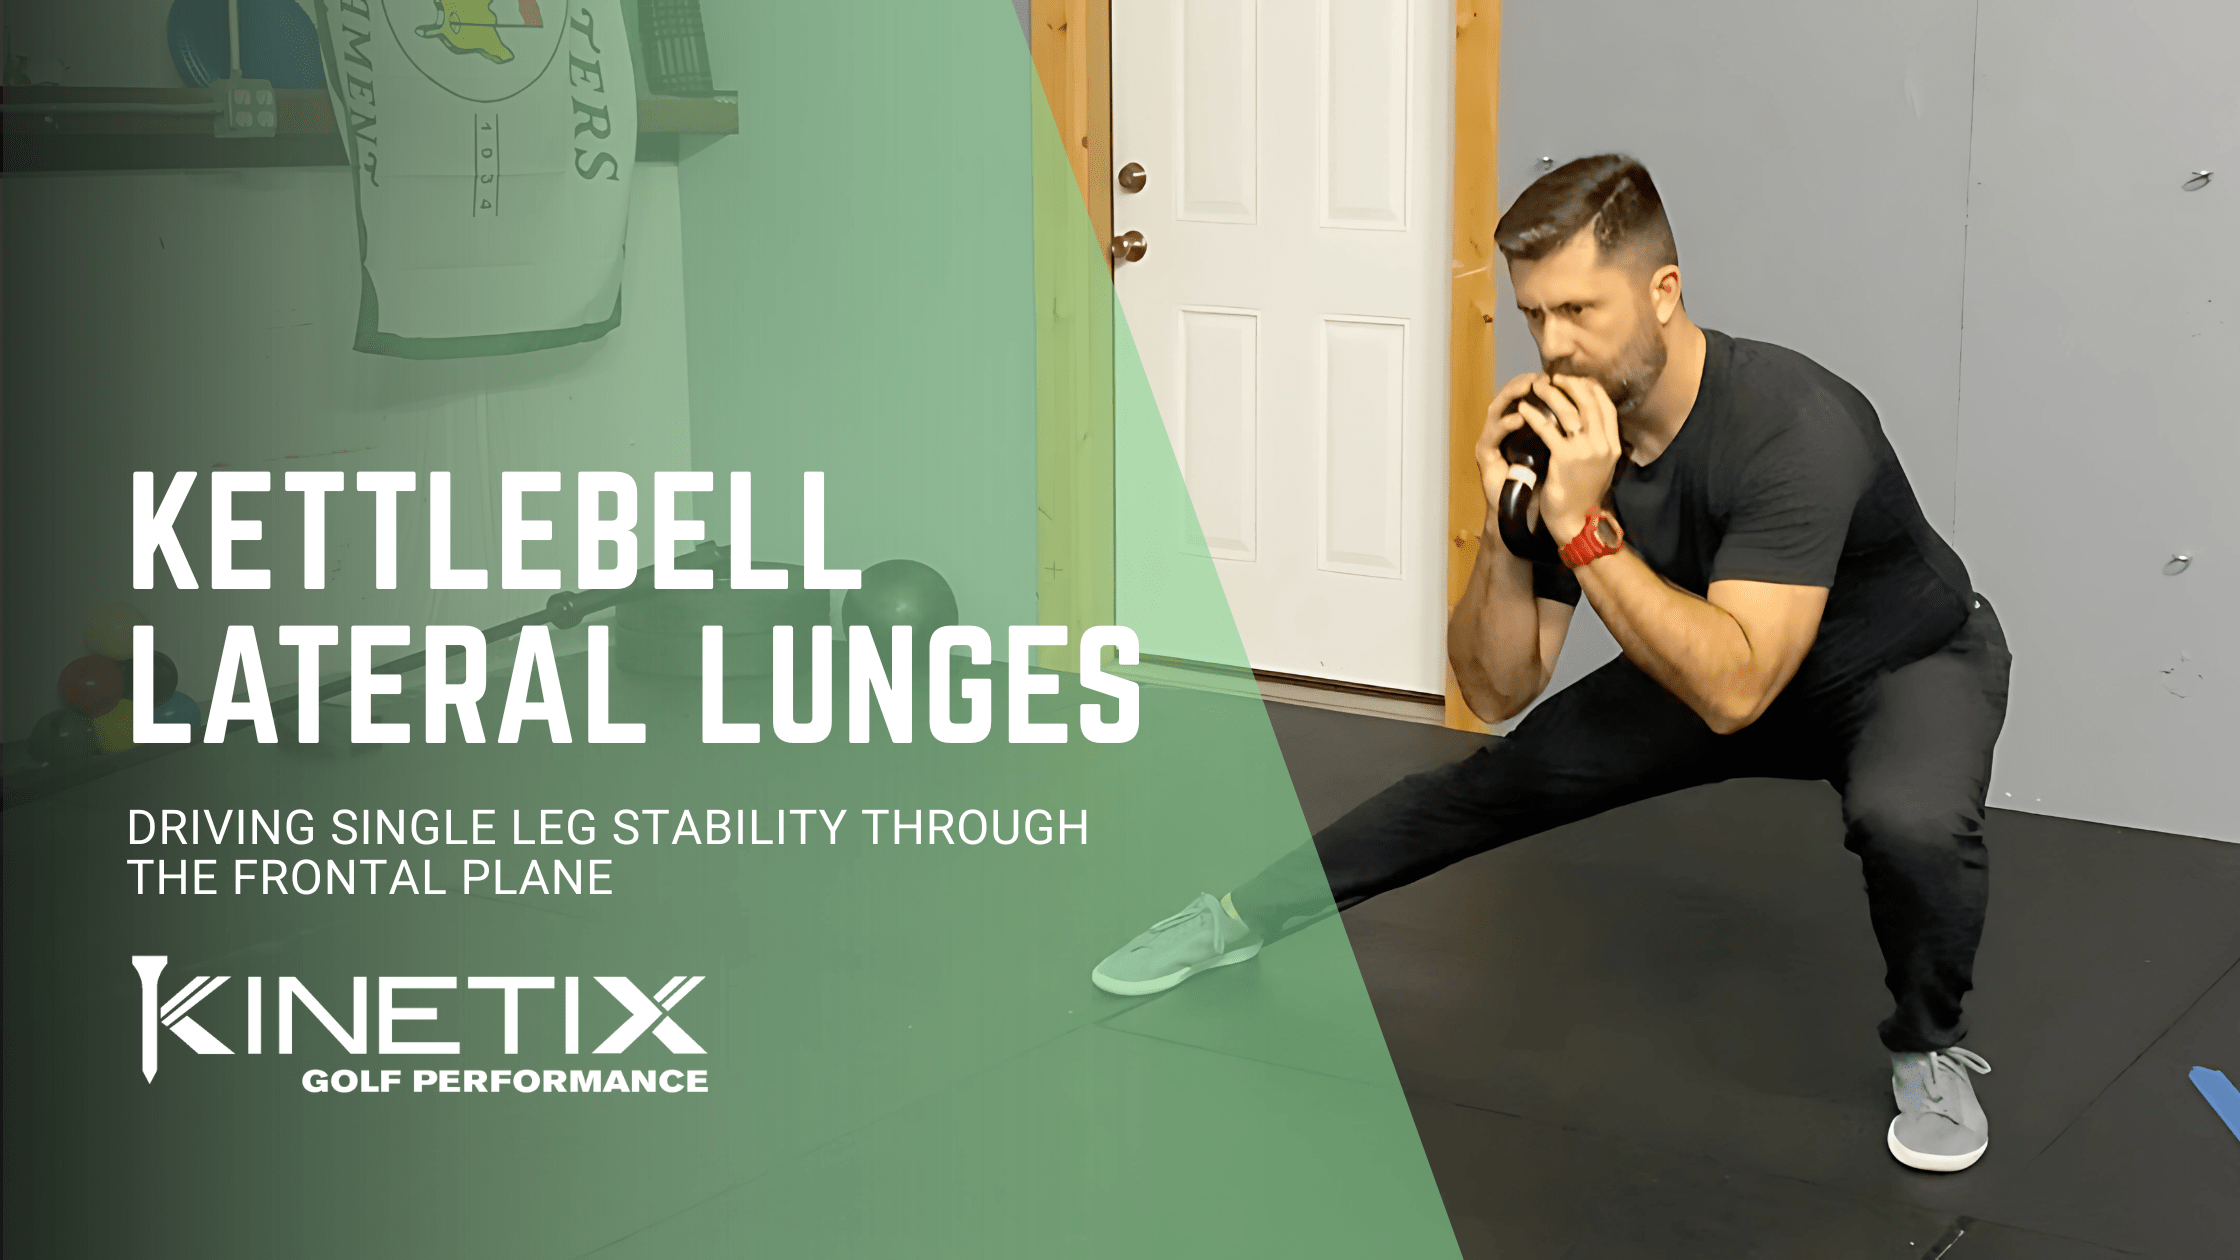
Kettlebell Golf Exercises: Kettlebell Lateral Lunges – Build Frontal Plane Strength & Hip Stability

Lateral lunges with a kettlebell are a great golf exercise to drive single leg stability through the frontal plane to help improve your golf swing.

Why Kettlebell Lateral Lunges Matter for Golfers

The golf swing is a complex three-dimensional movement, but most golfers unknowingly neglect training in the frontal plane—side-to-side motion. That’s where kettlebell lateral lunges come in.

This powerful movement enhances:

  • Frontal plane strength and mobility
  • Hip stability and control
  • Core activation and pressure regulation
  • Ground force transfer through the backswing and into the downswing

It’s one of the most underrated golf strength training tools, especially for players who struggle with consistency, balance, or generating power through transition.


Frontal Plane Training = Better Swing Control

The frontal plane controls lateral movement and weight shifts—both vital to the golf swing:

  • Backswing Stability: Resisting collapse through the trail hip
  • Transition Efficiency: Managing lateral motion from backswing to downswing
  • Follow Through Power: Driving off the lead leg without compensation

By strengthening your body’s ability to move and stabilize laterally, you build predictable movement patterns that improve swing tempo, sequencing, and ball-striking consistency.


How to Perform Kettlebell Lateral Lunges

Equipment: One kettlebell held goblet-style at the chest
Reps: 3 sets of 6–8 reps each leg

  1. Start Standing Tall
    Feet shoulder-width apart, kettlebell at the chest, elbows tucked.
  2. Step Out Laterally
    Take a big step to one side, push hips back, and bend the lead knee while keeping the trail leg straight.
  3. Engage the Core (IAP Strategy)
    Engage through your core using intra-abdominal pressure to keep spine neutral.
  4. Drive Back to Center
    Push through the foot of the bent leg to return to center.

Pro Tips:

  • Keep your chest tall and back flat
  • Don’t allow your knee to collapse inward
  • Focus on pushing the hips back, not just bending the knee
  • Make sure both feet stay flat on the ground

Why It Works for Golf

  • Hip Complex Development: Builds strength and range of motion through adductors, glutes, and hamstrings—key swing muscles
  • Improved Weight Transfer: Helps train effective lateral load and unload during the swing
  • Core-Driven Stability: Holding the kettlebell goblet-style forces core engagement, improving rotational control and reducing spine shearing forces
  • Injury Prevention: Balancing hip strength between both sides supports pelvic symmetry and minimizes overuse injuries

Golf Translation: Backswing → Transition → Follow Through

Every phase of your golf swing benefits from stronger lateral hip control:

  • Trail side glute supports your coil in the backswing
  • Core and lead hip absorb and redirect force during transition
  • You post into the lead hip with more stability for a cleaner finish

The result? More clubhead speed, less sway, and reduced energy leaks.


Level-Up Your Golf Strength Training

This exercise is just one of the dozens of targeted golf exercises in our PinSeeker Performance Program—a 6-week, lifetime-access golf workout program designed to build mobility, strength, and power exactly where you need it.

🏌️‍♂️ Swing with more rotation and less pain
🏋️‍♀️ Improve strength, flexibility, and balance
⛳️ Play more consistently, regardless of age or experience

✅ One-time purchase
✅ Lifetime access
✅ Golf-Specific workouts you can do anywhere

Train smarter, swing stronger, and see real gains on the course with PinSeeker!
our 6-week pinseeker performance program is the best online golf fitness program